Table of Contents
What is a 3 Way Switch?
A 3 way switch wiring is used to control your light from different positions. These special devices are used for making large rooms, study halls or halls where controlling the light from any point provides convenience and illumination. Unlike a standard single-pole switch, which has only “low” and “band” positions, a 3 way switch can be flipped in either direction at either position, allowing more detailed lighting control.
How Does a 3 Way Switch Work?
In a 3-way switch setup, you will have two switches connected to the same light fixture. Each switch has three terminal screws: one common terminal (usually dark colored) and two traveler terminals. The common terminal is connected to either the power source or the light fixture, while traveler terminals are connected to each other through traveler wires. This configuration allows current to travel in two possible paths, allowing the light to be turned on or off from either switch location
switch location
Components of a 3 Way Switch
- Common Terminal: This is the point where the current either comes in from the power source or goes out to the light fixture.
- Traveler Terminals: These are two terminals that connect the switches to each other. The current can travel through either of these paths.
- Ground Terminal: A grounding screw where the ground wire is connected to ensure safety.
Tools and Materials You’ll Need.

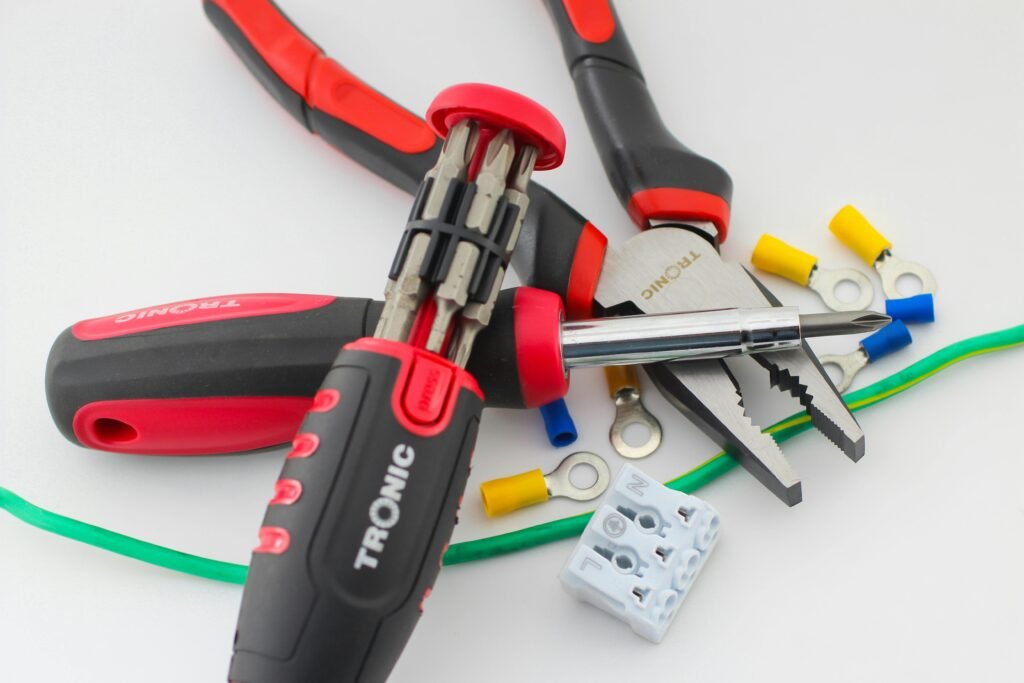
Before starting please gather following tools:
- Two 3 way switches
- 14/3 or 12/3 electrical wire (depending on your home’s wiring)
- Wire strippers
- Screwdrivers
- Electrical tape
- Wire nuts
- Voltage tester
- Wire cutters
- Needle-nose pliers
- Electrical boxes (if not already installed)
- Cable staples
- Wire labels
Safety First

Before working on any electrical project, ensure the power is turned off at the circuit breaker. Use a voltage tester to confirm that no power is flowing through the wires you’ll be working on. Always follow local electrical codes and regulations, and if you’re unsure about any part of the process, consult a licensed electrician.
Understanding the 3 way switch wiring diagram
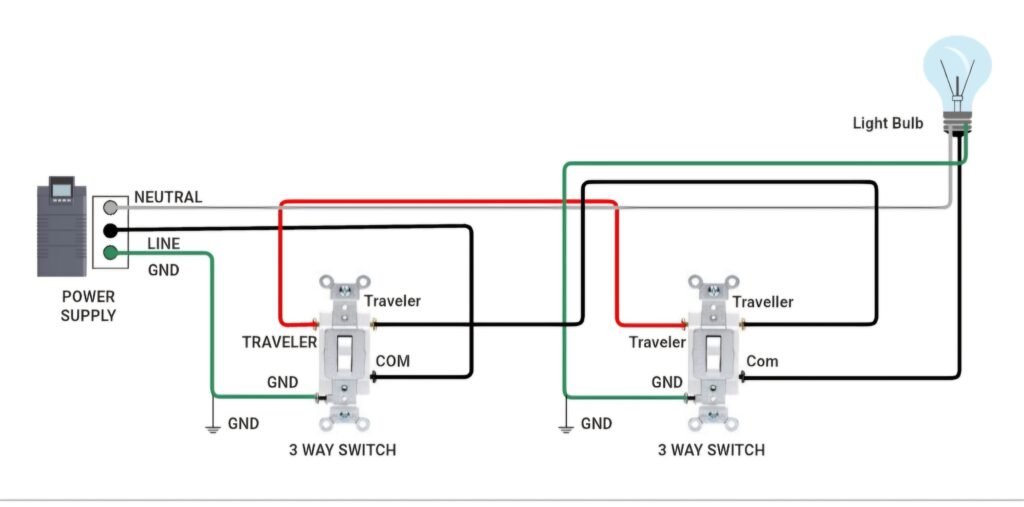
A typical 3 way switch wiring diagram includes the following components:
- Power Source: This is where the electricity comes from, typically a circuit breaker.
- First 3-Way Switch: The switch closest to the power source.
- Second 3-Way Switch: The switch closest to the light fixture.
- Traveler Wires: These connect the two 3-way switches.
- Light Fixture: The light that is controlled by the switches.
Basic Wiring Diagram

More Detailed Wiring Diagram
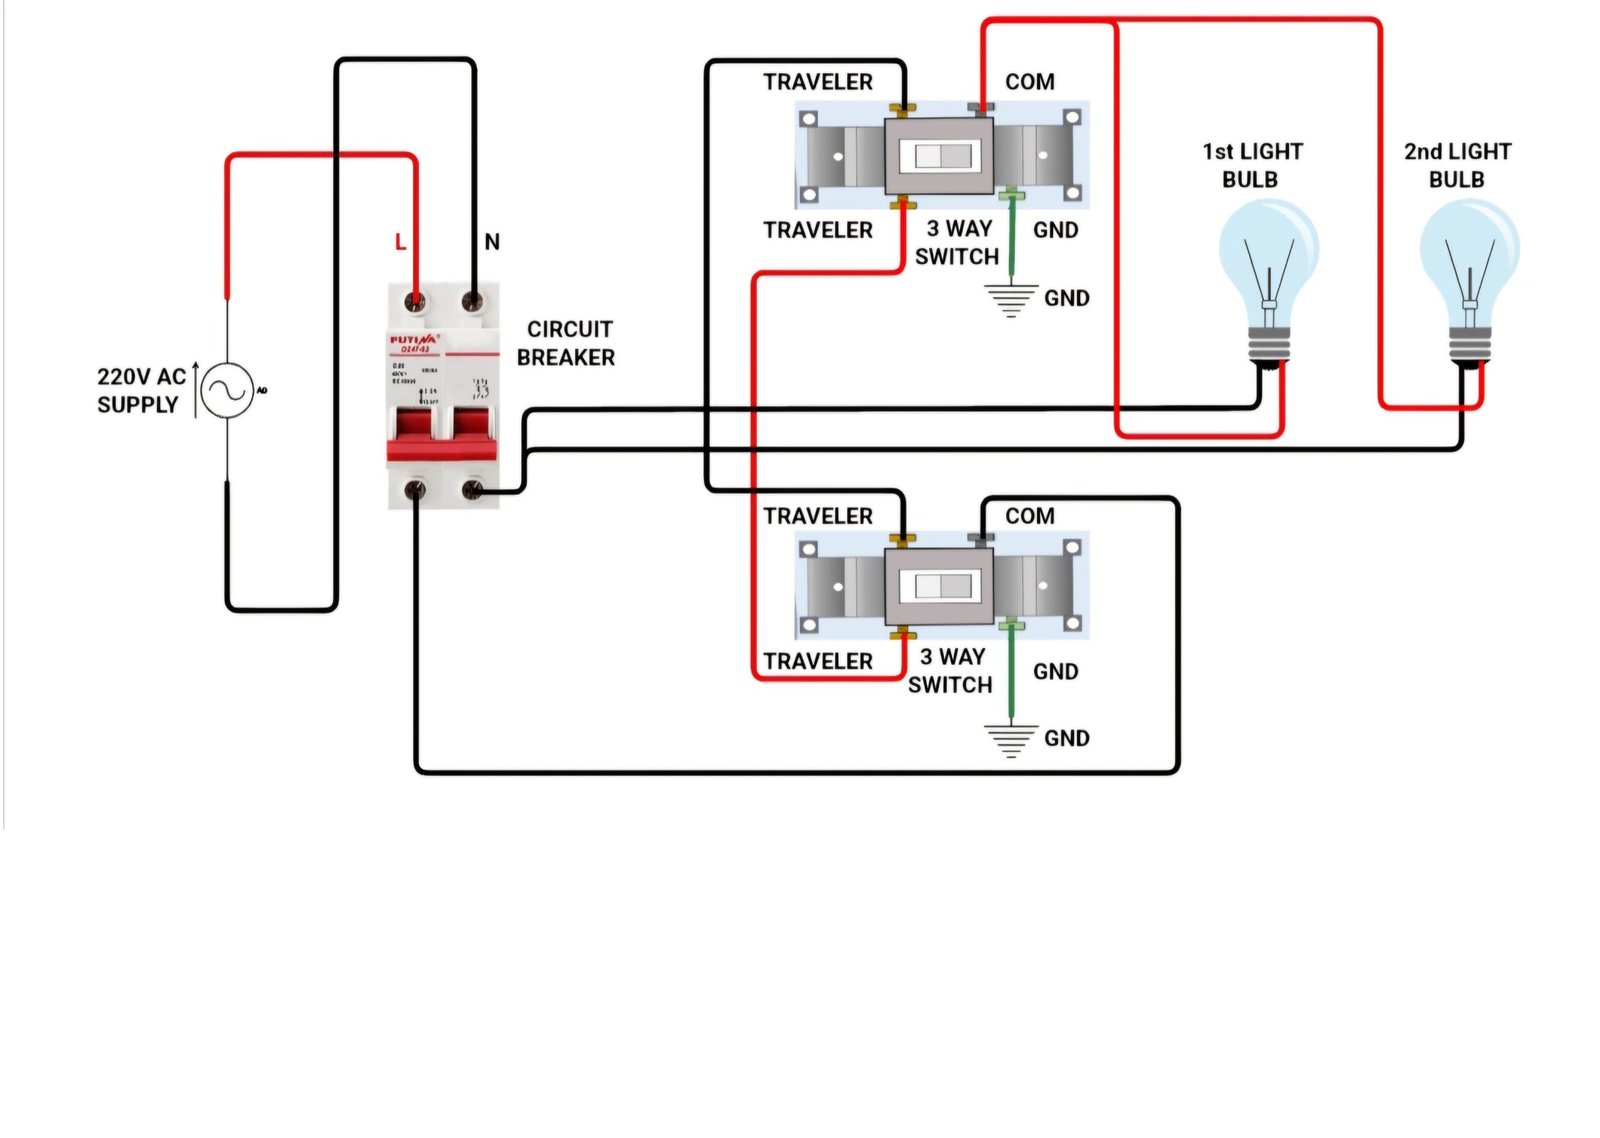
- From the Power Source:
- Black (hot) wire to common terminal on the first switch.
- White (neutral) wire to the light fixture.
- Ground wire to ground screws on all switches and light fixture.
- From the First 3-Way Switch to the Second 3-Way Switch:
- Red and black wires as traveler wires connecting traveler terminals on both switches.
- White wire (re-designated with tape as a hot wire) to the common terminal on the second switch.
- From the Second 3-Way Switch to the Light installation:
- Black wire from common terminal on the second switch to the light fixture’s black wire.
- White wire from power source to the light fixture’s white wire.
Step-by-Step Installation Guide
1. Turn Off the Power
Turn off the circuit breaker that controls the circuit you’re working on. Verify with a voltage tester that the power is off. This step is too important for your safety.
2. Run the Cables
Run the electrical cable from the first switch box to the light fixture, then from the light fixture to the second switch box. If you’re replacing existing switches, you can often use the existing wiring. Use cable staples to secure the cables along the studs and joists.
3. Install the Electrical Boxes

If not already installed, mount electrical boxes at the locations where you want to place the switches and the light fixture. Securely attach them to the wall or studs using screws or nails. Ensure they are level and flush with the wall surface.
4. Wire the First Switch
- Black (hot) wire: Connect this wire from the power source to the common terminal of the first 3 way switch.
- Traveler wires: Connect the red and black traveler wires to the traveler terminals.
- Ground wire: Connect the ground wire to the green grounding screw on the switch.
5. Wire the Light Fixture
At the light fixture box:
- Black wire: Connect the black wire from the first switch to the black wire of the light fixture.
- White wire: Connect the white wire from the power source to the white wire of the light fixture.
- Traveler wires: Connect the red and black traveler wires to the wires running to the second switch.
- Ground wire: Ensure the ground wire is connected to the light fixture’s grounding screw.
6. Wire the Second Switch
In the second switch box:
- Black wire: Connect the black wire from the light fixture to the common terminal of the second 3-way switch.
- Traveler wires: Connect the red and black traveler wires to the traveler terminals.
- Ground wire: Connect the ground wire to the green grounding screw on the switch.
7. Label the Wires
Use wire labels to mark the wires clearly, especially if they are not color-coded. This will help you ensure correct connections and simplify troubleshooting. Labeling can prevent confusion and errors during installation and future maintenance.
8. Check Your Work
Before you finish, double-check all connections to ensure they are secure and correctly placed. Incorrect wiring can cause malfunctions or even electrical hazards. Verify that all screws are tight and no wires are exposed.
9. Test the Setup

Once everything is done turn on the power from circuit breaker. Test both switches to ensure they operate the light fixture correctly from both locations. If the light doesn’t work as expected, turn off the power and recheck your connections. It’s a good idea to have a helper to operate the switches while you observe the light’s behavior.
Troubleshooting Tips
- Light Won’t Turn On: Check all connections and ensure no wires are loose or improperly connected. Confirm the power is turned on at the circuit breaker.
- Switches Aren’t Interacting Correctly: Verify that the traveler wires are correctly connected to the traveler terminals on both switches. Ensure the common terminal connections are correct.
- Flickering Light: This could indicate a loose connection somewhere in the circuit. Double-check all wire connections and ensure they are tightly secured.
- Both Switches Must Be in a Certain Position to Work: This often means the traveler wires are swapped. Recheck the traveler connections on both switches.
Common Mistakes and How to Avoid Them
- Incorrectly Identifying Wires: Always label your wires and use a voltage tester to identify hot wires. Misidentifying wires can lead to incorrect connections.
- Loose Connections: Ensure all wire nuts are tightly secured and no bare wire is exposed. Loose connections can cause flickering or failure.
- Improper Grounding: Make sure all ground wires are connected to the grounding screws. This is essential for safety and proper operation.
- Swapping Traveler Wires: Double-check the traveler wire connections. Incorrect traveler connections can cause the switches to function improperly.
Advanced Tips for 3-Way Switch Installation
- Use of Smart Switches: Consider using smart 3 way switches for more advanced control. These can be controlled via smartphone apps or voice commands and often include features like dimming and scheduling.
- Dimmer Switches: If you want to control the brightness of the light, use a compatible 3-way dimmer switch. Make sure it’s rated for the type of bulbs you’re using.
- Multiple Lights: If you’re controlling multiple light fixtures with the same switches, ensure you understand how to wire them in parallel to avoid overloading the circuit.
Conclusion
Installing a 3 way switch wiring can seem complex, but with careful attention to detail and the right tools, it’s a project that most DIY enthusiasts can handle. By following this complete guide to 3 way switch wiring diagrams and installations, you can enhance the functionality of your home lighting, making your living space more convenient and efficient.
Remember, safety is paramount when working with electricity. If you have any doubts about your ability to safely complete this project, do not hesitate to consult a licensed electrician. With patience and precision, you can successfully install a 3 way switch and enjoy the enhanced lighting control in your home. Happy 3 way switch wiring!
This expanded guide offers a comprehensive look into 3 way switch wiring, ensuring that you have all the information needed to successfully complete your installation. Whether you’re not such experienced, these detailed steps and tips will help you achieve a safe and functional lighting setup.
